KSP to go® Assembly manual

Tools:
You only need the following for radiant panels assembly:

  • Inch rule, Tape measure
  • Pressing pliers with press jaws for M-contour
  • Lasers (optional, for longer bands recommended for alignment)
  • Two press clamps / one-hand clamps with Opening > 450 mm (optional, helpful for the connection of wider plates such as KSP to go® 1200)
1.
  • Attach and press the distributors on individual panels, for multipanel strips, please see point 3.
2.
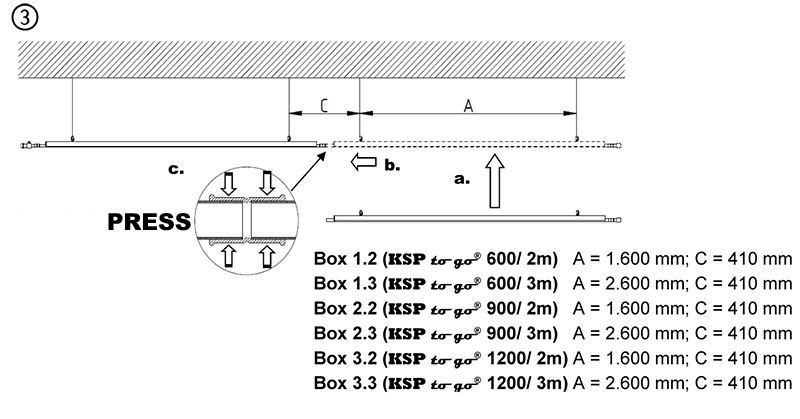
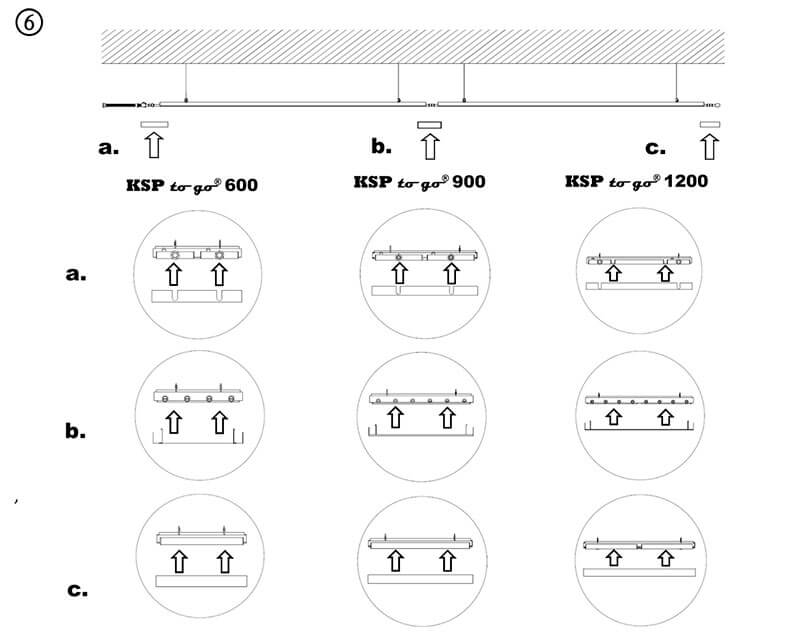
  • Measure the suspension points, mount the suspensions and suspend the first panel.
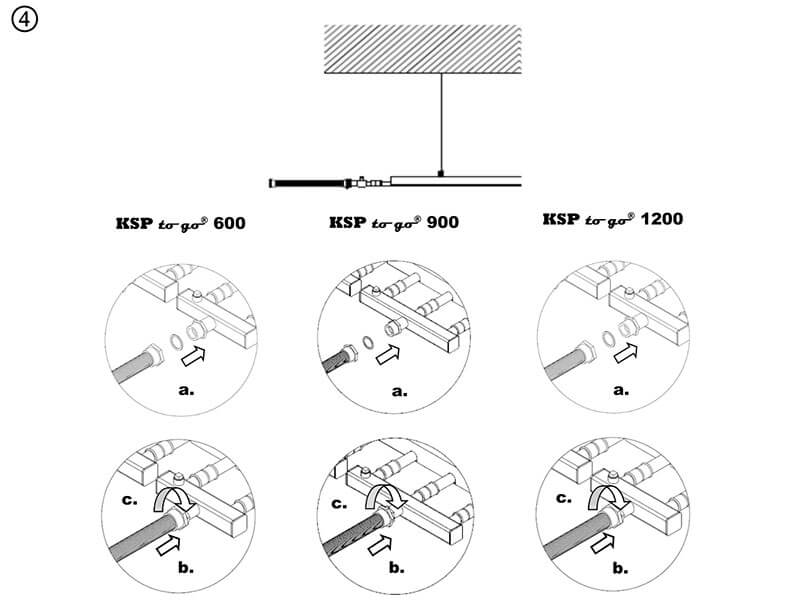
    Please use only flexible suspensions such as chains or wire ropes (not included).
    You can get suitable suspensions at your wholesaler.
    Measure the suspension points and mount the suspensions of your choice. The distances are shown in the following table.
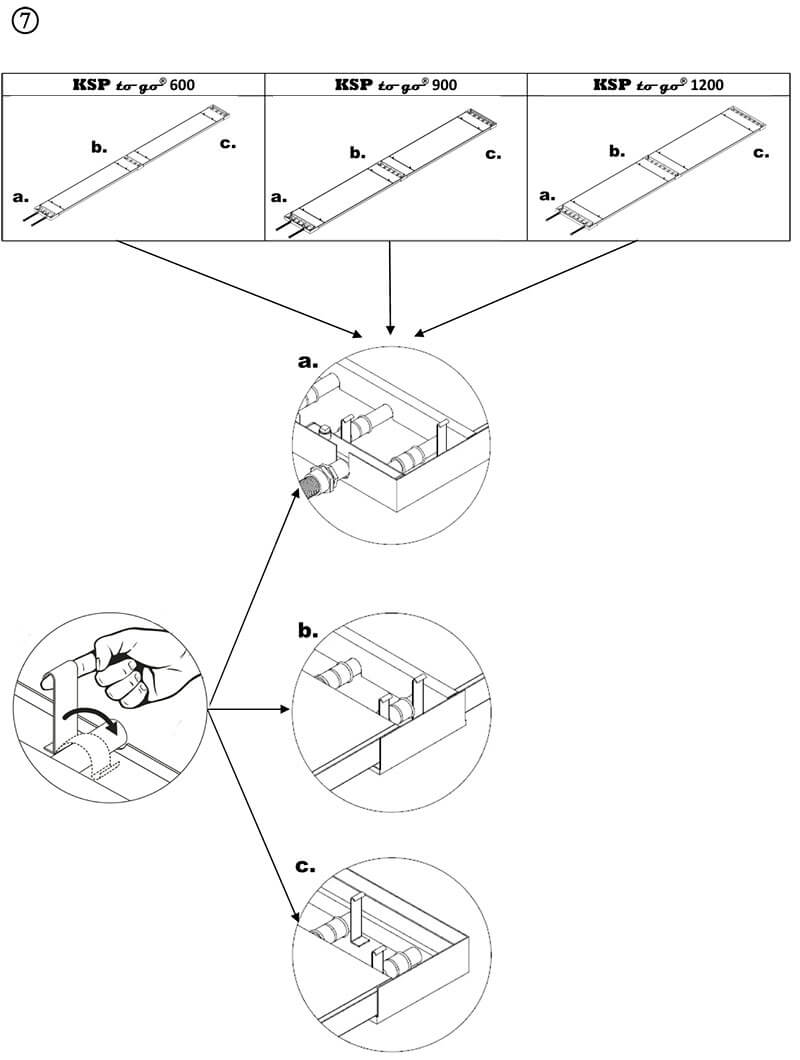
    The KSP to go® ceiling radiant panels have pre-assembled screw lugs, into which you can simply hang the chains or wire ropes.

3.
  • Measure the suspension points, mount the suspensions and suspend additional plates (in the case of multipart radiant panels strips).
    Please mind a gap (C) of 410mm of the suspension axes between two KSP to go® radiant panels
    This distance always stays the same for all panels widths and lengths.
    Mount the other panels and level them. Do not press the panels until you have mounted and aligned the complete strip.

4.
  • Attach the stainless steel corrugated hoses (supplied) to the distributor connections.
    Insert the supplied flat gaskets and screw the corrugated hoses to the distributors.

5.
  • Connect the strips to the hot water circuit
    Connect the supply and return pipes, fill the system and vent distributors at the connection side. Perform pressure test.

6.
  • Mount the distributor covers and eventually connection covers.

7.
  • Attach the covers.
Cookies help with the provision of our services. With the use of our services are you agreeing that we use cookies.